
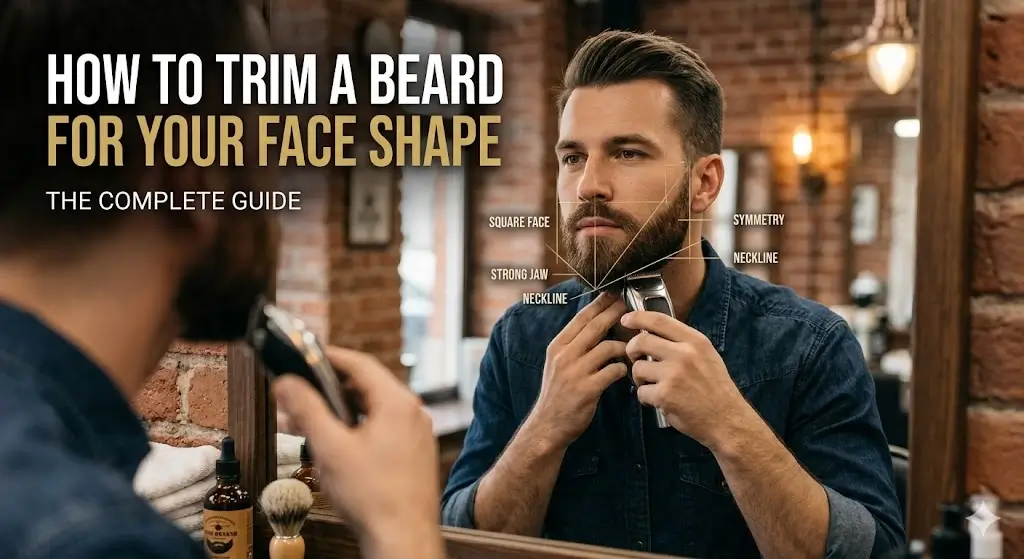
How to Trim a Beard for Your Face Shape
We have all dealt with this frustrating scenario. You stand at your bathroom mirror, pull a buzzing clipper across your jawline, and instantly hack off too much density. Instead of achieving a sharp, masculine jaw, you are left with a patchy, uneven mess that makes your entire face look completely asymmetrical.
Learning How to Trim a Beard for Your Face Shape is not a matter of pure luck; it is a tactical game of understanding your facial angles, managing hair density, and calibrating your tools. If you screw this specific step up, no amount of heavy styling balm or butter will fix the structural damage done to your natural silhouette.
To achieve a flawless, head-turning look, a great cut depends on matching the right beard architecture to your specific bone structure, backed by equipment that performs under pressure. Before you touch a moving blade to your skin, you must master both your head’s structural silhouette and the mechanical tool in your hand.
The Essential Grooming Kit
You cannot execute a master-level trim with low-grade tools. Having the right equipment—and selecting one of the best beard trimmers available—ensures clean cuts, prevents skin trauma, and eliminates unpredictable guard flex that ruins hours of growing progress.
| Tool or Material Needed | Required Specification or Grade | Why It Matters for This Job |
|---|---|---|
| Professional Beard Clipper | High-torque rotary motor with stable lithium-ion power supply | Prevents motor dragging, pulling, and snagging when cutting through thick, coarse beard hair. |
| Rigid Guide Guards | Metal-clip or premium glass-filled reinforced nylon attachments | Eliminates flexible guard bending that causes uneven, gouged patches along your jawline contours. |
| Beard Comb & Brush Set | 100% boar bristle brush and anti-static, hand-cut wooden comb | Exfoliates underlying skin, detangles tight curls, and trains hair to lie flat before outlining borders. |
| Maintenance Blade Oil | Pure, non-comedogenic cosmetic-grade mineral clipper oil | Reduces friction heat build-up, ensures smooth blade glide, and prevents severe skin irritation. |
| Zero-Overlap T-Blade Trimmer | Fine-tooth carbon steel or titanium outline blade | Delivers razor-sharp line definition along the cheek borders, mustache, and neck perimeter. |
Reality Check: Precision trimming requires an uncompromising mechanical foundation. Skimping with flexible plastic guards or dry, unlubricated blades will undermine even the most advanced trimming technique. Let us look at the structural breakdown done the right way.
Matching Beard Architecture to Your Face Shape
Every face shape requires a strategic distribution of hair bulk to create visual symmetry and balance. The core engineering rule of facial grooming is simple: add bulk where your bone structure lacks volume, and trim tightly where your face naturally widens. By manipulating lengths across different zones of your jaw, you effectively redesign your face profile.
1. The Round Face: Adding Angularity and Vertical Length
If you have a round face, your jawline lacks hard edges, and your face width is roughly equal to its vertical length. Your primary goal is to elongate the jawline and create the visual illusion of a stronger, more prominent chin.
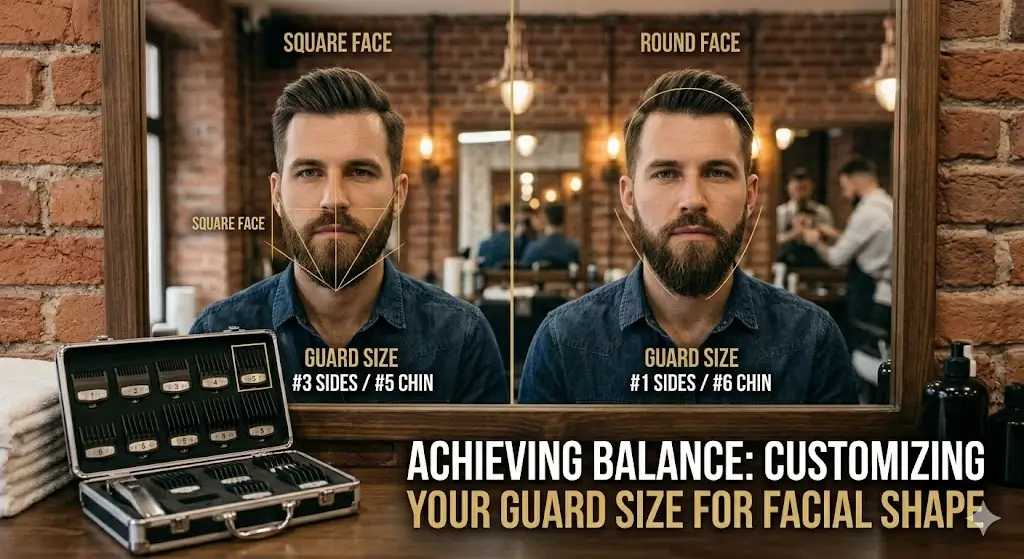
Keep the sideburns, cheeks, and sides trimmed tightly using a lower guard size (such as a #2 or #3 guard, approximately 6mm to 10mm). Gradually taper the length down toward the jaw, but allow the hair directly on the bottom of the chin to grow significantly longer. Sculpt sharp, boxy angles along the bottom corners of the jawline to break up the smooth, natural curves of your cheeks.
2. The Square Face: Softening Strong Borders and Blockiness
A square face naturally possesses a strong, wide, and aggressive jawline. Instead of exaggerating it with sharp corners—which can make your head look overly blocky or wider than it is high—focus on a jawline beard-trimming strategy that subtly softens the hard edges.
Keep the hair along the sides of your face relatively short, but round out the transitions smoothly. Trim the hair on the point of the chin into a gentle curve or a slight oval shape. This approach highlights your rugged bone structure while rounding off the extreme corners, creating an appealing, well-proportioned silhouette.
3. The Long/Oval Face: Balancing the Vertical Silhouette
For long or rectangular faces, the absolute last thing you want to do is add extra length to the bottom of your chin, as this will over-elongate your features. Instead, your focus must be on building horizontal width across the cheeks.
Keep the sides and cheek bulk slightly fuller (using a #4 or #5 guard) to widen your profile. Trim the bottom of the beard close to the jawline to cap vertical growth. When defining cheek lines, keep the boundary lines higher up on your face to create the illusion of width and fullness across your mid-face region.
4. The Heart/Diamond Face: Building Chin Bulk and Foundation
A heart or diamond face shape features a prominent forehead, wide cheekbones, and a narrow, pointed chin. Your beard needs to act as a stabilizing foundation to fill in the lower third of your face.
Grow out a full, thick beard around the chin, lower jaw, and mustache area to add volume where your bone structure naturally pinches inward. Keep the sideburns and upper cheeks trimmed tight to the skin to prevent your wide cheekbones from looking even wider. This creates a solid, balanced frame for your overall face structure.
Step-by-Step Execution Guide
Step 1: The Clean Slate Prep
Never trim a dirty, tangled, or wet beard. Wash your facial hair thoroughly with a specialized beard wash to clear away trapped sebum, dead skin cells, and residual styling products. Towel-dry, then blow-dry the hair completely on a low heat setting while brushing downward with a boar-bristle brush. This process untangles tight curls, relaxes the hair shaft, and exposes the true, uncompressed length and growth direction of your beard before you start cutting.
Step 2: Debulking the Sides and Setting Guard Transitions
Select your primary guard length based on your face shape strategy. Always start with a guard one size larger than your target length to prevent unfixable mistakes. Position the clipper flush against your skin and move upward against the direction of hair growth along the cheeks and sideburns. Taper smoothly downward toward the jaw. Keep the clipper flat; tilting the head will create uneven, gouged lines across your facial contours.
Step 3: Carving the Neckline and Cheek Borders
Fix your gaze straight ahead into a flat mirror at eye level. Place two fingers horizontally directly above your Adam’s apple; the point right above your top finger marks the absolute lowest center point of your neckline. Use an exposed trimmer blade to execute a clean, smooth curve from this central point upward toward the back corners of your jaw below each ear. Everything below this line must be shaved completely clean. For your cheeks, establish a straight line running from the mid-ear down to the corner of your mustache, removing any isolated stray hairs above it.
Step 4: Detailing, Blending, and Post-Trim Relief
Remove all guard attachments from your trimmer to work with the bare blade, or switch to a detail razor to crisp up the perimeter lines. Comb through the beard repeatedly in multiple directions to force rogue, hidden hairs out past the baseline profile, and snip them individually with beard scissors. Wash your face with cold water to soothe open skin pores, brush off trapped hair from your clipper blades, apply two drops of clipper oil to the teeth, and finish by massaging a nourishing, natural beard oil directly into your hair and skin.
The Consequences of Poor Tool Maintenance
Even the most flawless face-shape strategy will fail if you neglect the mechanical upkeep of your tools. Allowing hair dander, skin cells, and moisture to build up inside your clipper head creates friction, degrades blade sharpness, and causes internal motor drag.
When a clipper motor stalls mid-stroke due to high friction, the moving teeth stop shearing hair cleanly. Instead, the blades forcefully pinch and pull the hair follicle directly out of the skin. This mechanical pulling leads to severe razor bumps, ingrown hairs, painful follicle inflammation, and raw, patchy lines along your jawline. Regular cleaning, alignment checks, and oiling are essential requirements for precision cutting.
Frequently Asked Questions
Can I fix a patchy beard line by zero-gapping my clippers?
No. Zero-gapping simply aligns the cutting blade closer to the guide blade to cut hair flush at skin level. It cannot change your underlying genetics, hair density, or natural growth direction. If you lack proper hand stability and spatial symmetry, a zero-gapped blade will simply slice your skin open without hiding thin patches.
How do I find the perfect neckline without messing up?
The safest and most reliable technique is the “two-finger rule.” Sit up straight, look forward into a mirror, and lay your index and middle fingers horizontally right above your Adam’s apple. The spot right above your top finger is the apex of your neckline curve. Shave everything below that imaginary baseline bare; leave everything above it intact to build structural jaw depth.
How often should I trim my beard to maintain its shape?
For short to medium beards, a touch-up every 7 to 10 days is ideal to keep perimeter lines sharp and guard lengths uniform. For longer, full-grown beards, a thorough trim every 2 to 3 weeks is sufficient to maintain shape and snip away split ends without stripping away hard-earned bulk.
Should I trim my beard wet or dry?
Always trim your beard when it is 100% dry. Wet hair expands, stretches, and heavy water weight alters its natural fall. If you cut your beard while it is wet, it will contract as it dries, leaving you with an uneven cut that is significantly shorter than you intended.
Summary and Final Verdict
Executing a clean, well-proportioned beard line at home requires proper mechanical tool care and a solid understanding of your unique facial geometry. Never rush through the process, keep your cutter head oiled and properly tensioned, and shape your beard’s bulk distribution to complement your natural bone structure. Master the technical fundamentals of How to Trim a Beard for Your Face Shape, equip yourself with one of the best beard trimmers, keep your blades calibrated, and eliminate the need for costly barber maintenance visits for a routine you can control yourself.