Table of Contents
ToggleHow to Clean an Electric Shaver: The Complete 2026 Masterclass
Let’s be real for a second, guys. Mornings are chaotic. Most of us barely have time to grab a coffee, let alone perform a surgical teardown of our grooming tools. You finish your shave, give the razor a quick tap on the edge of the sink, and toss it in the drawer. It’s totally understandable.
But then, a few months down the line, something changes. Your incredibly expensive, top-tier shaver starts sounding a bit strained. It feels warm against your face. Instead of gliding smoothly, it starts skipping and yanking hairs. By noon, your neck is covered in itchy, angry red razor bumps. It’s frustrating, and it’s easy to blame the brand or assume the motor is dying.
I’ve been there, and I’ve ruined good equipment making that exact assumption. The truth is, nine times out of ten, your machine is perfectly fine. It’s just struggling to breathe. An electric shaver is essentially a high-performance micro-engine, and right now, it’s running without oil while buried in dust.
Here at MenReviewHub, we don’t just review these tools; we tear them apart. In this guide, I want to walk you through the practical, real-world routines that will keep your shaver whisper-quiet, surgically sharp, and kind to your skin. No judgment, no overly complex chemistry—just expert advice to protect your face and make your investment last for years.
“We buy electric shavers to save time and protect our skin. But when metal rubs against metal at 10,000 RPMs inside a dirty chamber, we accidentally create the perfect storm for skin irritation and dull blades. A simple, 60-second habit changes everything.”
1. What Exactly Are We Cleaning? (The Science of “Gunk”)
To really understand why a simple water rinse isn’t always enough, it helps to know what’s actually happening inside that cutter block. Every time you shave, you aren’t just cutting hair. The foil is gently exfoliating the Stratum Corneum (the top layer of dead skin cells) and sweeping up sebum (your skin’s natural hydrating oil).
The Biological Side: Protecting Your Skin
When keratin dust (hair and skin) mixes with oily sebum in a warm, damp bathroom, it forms a sticky paste. If left alone, this becomes a cozy home for bacteria like Staphylococcus. When you use that dirty shaver again, the blunt blades create micro-tears in your skin, and the machine literally rubs that bacteria directly into your pores. That is the exact mechanism behind pseudofolliculitis barbae—those painful, cystic razor bumps.
The Metallurgical Side: Protecting Your Blades
High-end shavers use hypoallergenic stainless steel or titanium, but no metal is completely immune to “micro-pitting.” When moisture and acidic skin oils sit on the microscopic edge of a blade for days, it causes invisible corrosion. The blade doesn’t visibly rust, but the cutting edge loses its surgical sharpness. It stops slicing and starts pulling. This also forces the motor to work harder, quietly killing your battery life.
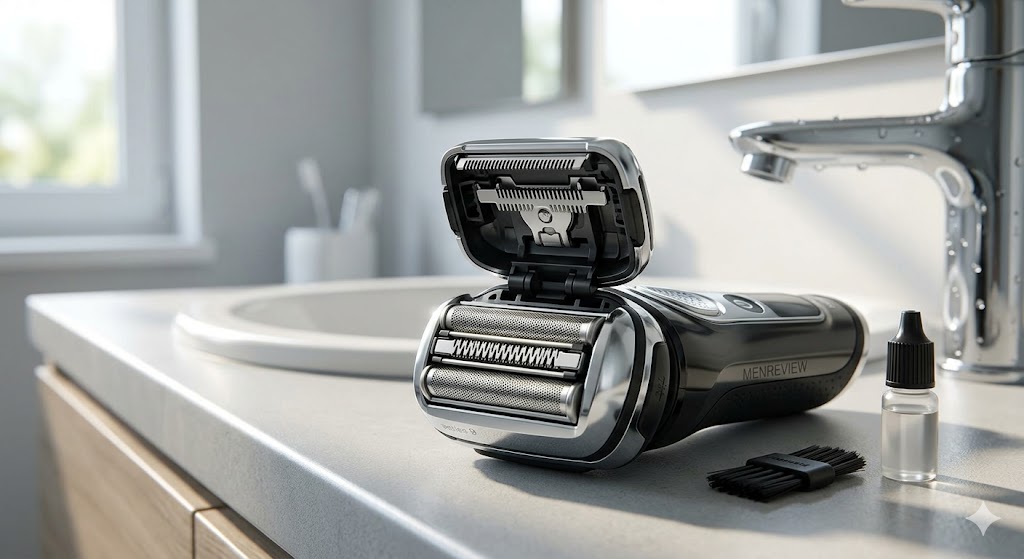
2. Your Minimalist Cleaning Toolkit
You don’t need a degree in chemistry to do this right. A highly effective, professional-grade maintenance routine only requires four basic items you likely already have under your sink.
- The Nylon Brush: Use the little brush that came in the box. It’s perfect for sweeping out dry dust. (But remember, we only brush the internal blades, never the delicate outer foil).
- Liquid Anti-Bacterial Hand Soap: A standard pump soap (like Dial or Softsoap) is brilliant. Water alone can’t wash away oil. The soap binds to the sebum and melts it away. Avoid harsh dish detergents, as they can strip the anti-corrosion coatings off the metal.
- 70% Isopropyl Alcohol: Used once a month to reset and sanitize. Why 70% and not 90%? Because 70% has enough water to penetrate bacterial cell walls and destroy them, while 90% evaporates too fast. It also displaces water to prevent rust.
- Light Machine Oil (Clipper Oil): This is the secret weapon. After a deep clean, the metal is completely bare. A single drop of clipper oil reduces friction, keeping the motor cool and the blades sharp. (Please, never use WD-40 or cooking oils like olive oil—they will ruin the machine).
3. The Veteran’s 3-Tier Maintenance Routine
Don’t let this feel like a chore. By breaking it down into a daily habit, a quick weekly reset, and a monthly tune-up, maintaining your shaver becomes effortless.
Tier 1: The Daily Habit (The 60-Second Flush)
Do this immediately after shaving to evacuate the dust before it settles.
- Pop & Tap: Remove the foil cassette or open the rotary head. Gently tap the solid plastic frame against the sink. (Never tap the metal directly).
- The Hot Flush: If your shaver is waterproof, turn the motor ON. Hold the cutting blades under hot running tap water for 10 seconds. The vibration and heat will blast out the debris.
- Air Dry: Shake off the water. Leave the head detached on your counter to air dry. Don’t zip it up wet in a travel case!
Tier 2: The Weekly Reset (The Soap Emulsion)
Once a week, we need to melt away the built-up skin oils.
- The Soap Drop: Put one drop of liquid hand soap directly onto the foils or rotary discs. Add a splash of warm water.
- The Lather: Turn the shaver on for 15 seconds. It will whip the soap into a thick foam that reaches deep into the cutter block, dissolving the grease.
- The Purge: Keep the motor running and submerge the head under hot water until it runs perfectly clear.
Tier 3: The Monthly Deep Clean (Sterilize & Lubricate)
This is the clinical reset. If you have sensitive skin, do not skip this.
- The Alcohol Wipe: Dip a cotton swab in 70% isopropyl alcohol and wipe down the inner chamber, blades, and housing. Let it evaporate completely to kill all bacteria.
- The Lifesaver (Lubrication): Because soap and alcohol strip all the oil away, you must re-lubricate. Put one drop of clipper oil on the foils. Turn the shaver on for 5 seconds to let the oil coat the internal blades. Wipe away any excess on the outside. This single step extends the life of your blades by months.
4. Brand-Specific Quirks (Know Your Machine)
Not all shavers are built the same. Here are the specific tricks for the most popular models to ensure you don’t accidentally break them.
Braun Series 9 & 7 (The Cassette System)
Braun combines the outer foil and the inner cutter into one unified “cassette.” Because you cannot separate them, hair dust gets trapped inside easily. The weekly soap lather method is absolutely vital for Braun users to force the debris out from between the integrated layers.
Panasonic Arc5 & Arc6 (The Sonic Mode)
Panasonic shavers are incredible, and they have a hidden trick. If you hold the power button down for 2 seconds, it enters “Sonic Cleaning Mode.” The blades vibrate at an ultra-high frequency without fully engaging the cutting motion, perfectly designed to shake water and soap through the head without splashing it all over your mirror.
Philips Norelco 9000 (The Rotary Teardown)
Hair gets sucked deep into the plastic cups under the spinning discs. Once a month, you need to twist the colored retaining rings and pull the circular blades out. Crucial Warning: Do not mix up the blades and guards! They wear down together like a lock and key. Clean them one by one, keeping them matched.
5. The Math: Automatic Stations vs. Manual Cleaning
If you buy a flagship model, it usually comes with a massive “SmartCare” cleaning and charging station. You dock the razor, press a button, and it washes, dries, and lubricates the machine automatically. Are they worth it?
The Reality: Yes, they are incredibly convenient and keep your shaver feeling factory-new. However, let’s look at the economics. The fluid cartridges need replacing every 4 to 8 weeks. Over a 3-year lifespan, you might spend $100 to $150 just on cleaning fluid. Meanwhile, a bottle of clipper oil and some hand soap costs about $8 and lasts for five years.
The Veteran’s Hack:
If you love your cleaning station but hate buying cartridges, do this: Never put a shaver full of dry hair into the station. Always pop the head off and tap the dry dust into the sink first. By keeping the bulk of the hair out of the fluid, you can easily stretch a single cleaning cartridge to last 3 to 4 months.
6. Fatal Mistakes: How Good Gear Gets Ruined
Even the most careful guys can accidentally damage their gear simply because the manuals don’t explain this well. Avoid these common pitfalls:
- The Towel Trap: Never try to dry your shaver foils by rubbing them with a bathroom towel. The terrycloth loops will snag the micro-thin metal screen and rip it cleanly off the frame.
- Boiling Water: Hot tap water is great, but dropping your shaver head into boiling water to “sterilize” it will melt the internal rubber seals that make the shaver waterproof.
- Ignoring the Pop-Up Trimmer: The sideburn trimmer on the back collects dust too. Put a drop of oil on those teeth once a month, or they will rust shut.
- Sharing the Machine: A shaver creates micro-abrasions on the skin. Sharing it significantly increases the risk of transferring staph infections or fungal spores. Treat it like your toothbrush.
The Bottom Line: Protect Your Face
Taking care of your electric shaver shouldn’t feel like a grueling chore. It is simply part of the necessary ritual of looking sharp and taking care of yourself. By taking just 60 seconds a day to flush it out, and dedicating five minutes a month to oiling the blades, you will completely transform your shaving experience.
Treat your tools with the respect they deserve, and they will reward you with a closer shave, fewer breakouts, and years of faithful service. Your skin, and your wallet, will thank you.
Ready to upgrade your morning routine entirely, or perhaps taking the plunge into a fully shaved dome? The rules change slightly when you move north of the forehead. Check out our latest, heavily tested guide on the Best Electric Shavers for Bald Heads in 2026 to find a machine that matches the rugged demands of your lifestyle.

“Adam Lee is the lead technical reviewer at MenReviewHub and a veteran of the traditional wet shaving community. With over a decade of hands-on experience, Adam specializes in dissecting high-performance grooming hardware and dermatological skincare. He doesn’t just ‘read the box’—he puts every product through a brutal 30-day real-world trial to ensure your morning routine is a tactical success, not a crime scene.”