Stop dragging a dirty razor across your face. A clogged electric shaver isn’t just killing your blades; it’s actively sabotaging your skin. Learn how to clean your gear like a pro, prevent razor burn, and double your blade life today.
Let’s have a brutally honest conversation: Your electric shaver is probably disgusting.
You grab it every morning, expecting it to make you look sharp for that crucial Zoom call or date night. But when was the last time you actually deep-cleaned it? If your routine consists of aggressively tapping it against the bathroom sink and calling it a day, we have a serious problem. You are no longer just shaving; you are rubbing a microscopic petri dish of dead skin cells, dried sebum (oil), and multiplying bacteria directly into your freshly opened pores.
As a grooming expert, I see the collateral damage of poor maintenance every single day. Guys constantly complain about random breakouts, severe razor burn, or wonder why their brand new $200 Braun feels like a butter knife after just three months. They blame their “sensitive skin” or the machine itself. The truth? The machine is fine. It’s just suffocating.
If you want a flawless shave, you need to treat your hardware with respect. Here is the definitive, no-BS guide on how to clean your electric shaver like a professional, protect your skin barrier, and make your expensive blades last twice as long.
Table of Contents
Toggle1. The Ugly Truth: Why You Must Clean Your Electric Shaver
Let’s not sugarcoat this. Skipping maintenance isn’t just “lazy”—it’s destroying your face and burning your money.
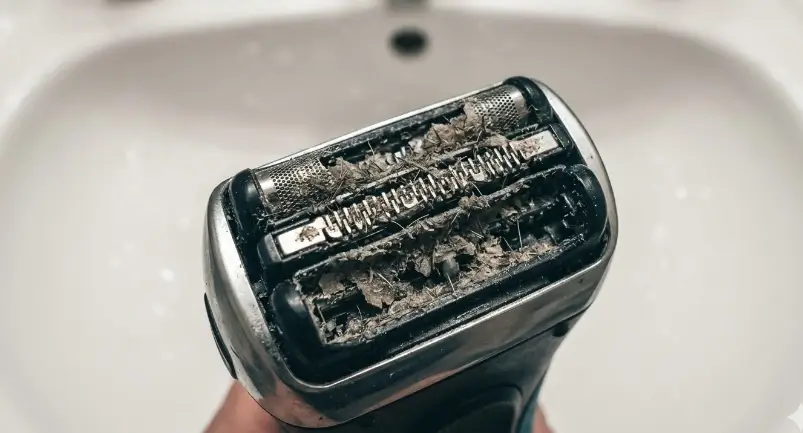
The “Petri Dish” Effect
Every time those blades glide over you, they harvest a nasty cocktail of hair dust and facial oil. When you leave that mixture in a warm, damp bathroom, it becomes a bacterial breeding ground. The Result: Those “random” red bumps on your neck? That’s likely folliculitis caused by your dirty razor. A quick blast of Sanitizing Shaver Spray is often the only thing standing between you and a massive breakout.
Friction is the Performance Killer
Your shaver is a high-performance engine. When gunk builds up in the cutters, the motor struggles. The Result: The blades run incredibly hot. If your face feels like it’s being dragged across hot asphalt, your machine isn’t broken—it’s just choked to death with friction.
The Financial Hit
Quality replacement heads cost $40 to $60. Residue buildup causes micro-corrosion on the steel. The Result: You’ll be hunting for Replacement Blades on Amazon every six months instead of the standard 18 months. Clean your gear, keep your lunch money.
Note for the Bald Brothers: This is critical for head shavers who cover a massive surface area of skin. Hygiene is non-negotiable. If you need a machine engineered for easy washing, check out our guide on the Best Electric Shavers for Bald Heads 2026.
2. Daily Maintenance: The “30-Second Reset”
You don’t need a 20-minute spa day for your shaver every morning. But you do need a 30-second reset. Think of it like brushing your teeth—skip it, and things get nasty fast.
The “Running Rinse” (Wet/Dry Models)
If you own a powerhouse like the Panasonic Arc5 or Braun Series 9, it’s waterproof. Use it.
- Hot Water is King: Cold water won’t dissolve skin oils. Crank the heat.
- Keep it Humming: Put a tiny drop of liquid soap on the foils and turn the motor on under the water. The vibration shakes loose the “stubble cement.”
- Rinse: Let it run for 15 seconds. Done.
The “Dry Brush” (Non-Waterproof)
For older models or dry-only travel shavers.
- Pop the Top: Remove the foil frame to expose the inner cutters.
- Brush the Interior: Use a Double-Sided Brush to sweep hair out of the chamber.
- Hands Off the Foil: Never brush the delicate outer foil. You will ruin the microscopic holes and shred your face later.
⚠️ Stop the “Porcelain Percussion”
I see this in locker rooms constantly: a guy finishes and bangs the head of his shaver against the sink to knock the hair out. Stop it. Foils are thinner than paper. One tiny dent from the porcelain turns your shaver into a cheese grater. If you must tap it, tap it gently on a Soft Microfiber Towel.
The “Shake & Bake” (Air Drying)
After washing, shake off the excess water (in the air, not against the sink). Leave the head unit off. If you put a wet shaver into a dark drawer with the cap on, you are literally building a luxury hotel for mold. Let it air dry on the counter.
3. The Professional Deep Clean: Weekly Routine
Once a week, you need to stop playing around. The daily rinse is a surface fix. This is the “Saturday Morning Oil Change” for your grooming gear.
Step 1: The Full Disassembly
Don’t just pop the cap; get in there. For foil shavers, remove the whole cassette. For rotary shavers, pop open the retaining frame to access the individual three cutters.
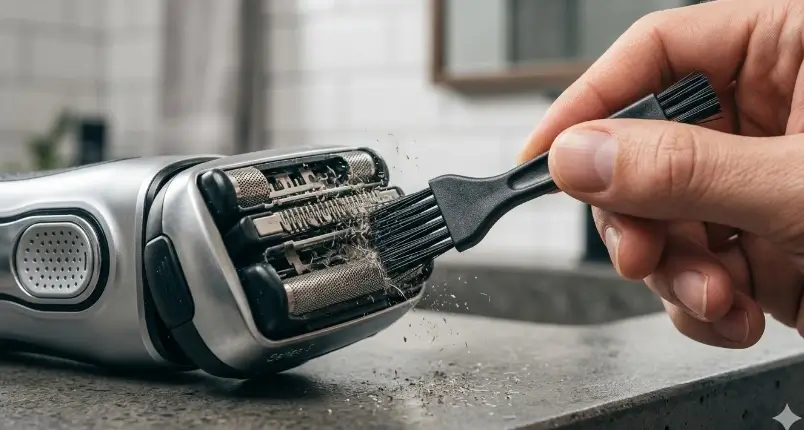
Step 2: The Precision Dry Brush
Grab your Cleaning Brush. Sweep out the “hair chamber” under the blades. You’ll be shocked at the dust hiding there. Gently sweep the inner blades. And again: DO NOT brush the outer foils.
Step 3: Sanitizing (The Secret Sauce)
Water doesn’t kill bacteria. Pour a little 70% Isopropyl Alcohol into a container and dip the cutting elements in for 30 seconds. In a rush? Hit it with a Professional Shaver Cleaning Spray—it’s alcohol on steroids that evaporates instantly.
Step 4 & 5: Soak and Breathe
If it’s still greasy, let the head soak in warm soapy water for 5 minutes to break down the “bio-film”. After that, lay the components out on a towel and let them air dry for at least 2 hours. A bone-dry shaver is a safe shaver.
4. Lubrication: The Secret to Shaver Longevity
If you skip this step, you might as well be shaving with a rusty pocketknife.
Metal rubbing against metal at 10,000 RPMs creates immense friction and heat. When blades get hot, they expand, lose their edge, and start dragging across your skin (hello, razor burn). Lubrication is the ultimate life-extender.
The “2-Drop Rule”
- Ensure the shaver is bone-dry (oil and water don’t mix).
- Place exactly one drop of oil on each foil or rotary head.
- Turn the machine on for 15 seconds to let the oil work deep into the cutters.
- Wipe away the excess with a tissue. You want the oil inside the machine, not smeared on your face.
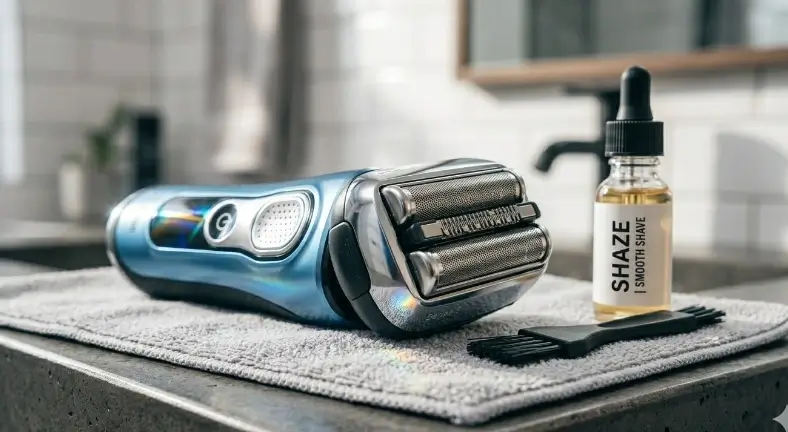
What Oil Should You Use?
Do not grab WD-40 from the garage or olive oil from the kitchen. You will ruin the motor and break out in hives. The Gold Standard is Wahl Clipper Oil. It’s thin, odorless, and perfect. Want a dedicated spray? Grab Freehold Shaver Lubricant.
5. Cleaning Station vs. Manual: The Breakdown
Every brand tries to upsell you on their bulky, automated cleaning base. Is it worth the “Lazy Tax”?
| Feature | Cleaning Station (The “Tesla” Method) | Manual Cleaning (Old School) |
|---|---|---|
| Effort | 1/10 (Drop it in and push a button) | 8/10 (Brush, soak, dry, oil manually) |
| Hygiene & Lube | Exceptional (Fluid sanitizes and lubes automatically) | Good (Only if you are disciplined with alcohol/oil) |
| The Cost | Ongoing subscription for Cartridges ($$$) | One-time purchase of brush and oil ($) |
| The Verdict | Perfect if you value time over money. | Perfect if you want total control and no ongoing fees. |
6. When to Replace Your Blades? (The Hard Truth)
You can clean it until it shines, but steel eventually dies. If you push past the 18-month mark, you aren’t shaving—you’re just annoying your face.
The “3 Signs of Death”
- The “Yank” Factor: If it pulls hair instead of cutting it, the blade is dead.
- The Infinite Pass: If a 3-minute shave now takes 8 minutes and 40 passes, the cutting geometry is gone.
- The Return of the Red: If you are cleaning and oiling perfectly but still getting razor burn, the microscopic edges are pitted and jagged. Replace immediately.
Buy the Right Parts (OEM Only)
Don’t get paralyzed by model numbers. Here are the genuine “Greatest Hits” you need (avoid the cheap knockoffs):
- Braun Series 9/9 Pro: Braun 94M Replacement Head
- Philips Norelco: SH71 or SH91 Blades
- Panasonic Arc5: Outer Foil & Inner Blade Combo (Never replace just one).
The Bottom Line: Discipline Pays Off
A clean shaver is the difference between looking like a polished professional and a guy struggling with a rash. Keep it rinsed daily, deep-clean it weekly, and lubricate the damn blades.
If you take care of your tools, they take care of your face. Still haven’t picked a machine that fits your lifestyle? Jump over to our brutal, honest breakdown of the Best Electric Shavers of 2026 to see which models practically clean themselves.
Stay sharp, and keep the gear clean.

“Adam Lee is the lead technical reviewer at MenReviewHub and a veteran of the traditional wet shaving community. With over a decade of hands-on experience, Adam specializes in dissecting high-performance grooming hardware and dermatological skincare. He doesn’t just ‘read the box’—he puts every product through a brutal 30-day real-world trial to ensure your morning routine is a tactical success, not a crime scene.”