
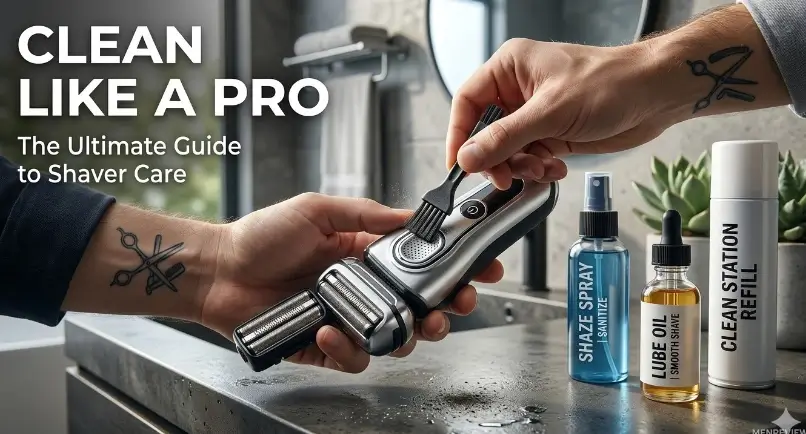
How to Clean an Electric Shaver: The Ultimate Master Protocol
Direct Answer: What Is the Proper Way to Clean an Electric Shaver?
The proper way to clean an electric shaver requires a daily 15-second running rinse under warm water with mild soap while the motor is engaged, followed by a weekly 90-second submersion in 70% isopropyl alcohol and lubrication with 1 to 2 drops of unfragranced mineral clipper oil. Tapping shaver heads against porcelain sinks creates microscopic foil dents that scratch skin and destroy cutting tolerance. For models with automated self-cleaning docks, consult our master guide to the best electric shavers.
You grab it every single morning, expecting it to effortlessly glide across your jawline and make you look like an absolute professional for that crucial board meeting, high-stakes client pitch, or weekend date night. But let’s be brutally honest for a second: when was the absolute last time you actually deep-cleaned that high-tech piece of machinery?
If your entire grooming maintenance routine consists of aggressively knocking the razor head against the edge of your porcelain bathroom sink, blowing a quick puff of air into the cutting chamber, and calling it a day, you have a massive, unseen hygiene crisis on your hands. You are no longer just shaving your face; you are actively grinding a microscopic petri dish of dead skin flakes, dried sebum, trapped sweat, and rapidly multiplying bacteria directly back into your freshly opened, highly vulnerable pores.
⚡ Quick Reference Specification: Master Hygiene & Maintenance Protocol
| Maintenance Stage | Execution Cadence | Chemical / Tool Agent | Mechanical Action | Clinical & Hardware Benefit |
|---|---|---|---|---|
| Thermal Running Rinse | Daily (Post-Shave) | Warm Water + Mild Liquid Soap | Motor ON (15 Sec Flush) | Emulsifies skin sebum and purges loose stubble |
| Internal Dry Sweep | Weekly | Stiff-Bristle Cleaning Brush | Sweep Drive Pins & Chamber ONLY | Prevents motor stasis without damaging foil screens |
| Microbial Sterilization | Weekly | 70% Isopropyl Alcohol Bath | 60–90 Second Metallic Soak | Eliminates 99.9% of bacterial spores (S. aureus) |
| Boundary Lubrication | Weekly (Post-Alcohol) | Pure Mineral Clipper Oil (Low Viscosity) | 1–2 Drops on dry foils; 20 Sec run | Lowers surface friction heat by up to 15°F |
| Mineral Scale Purge | Monthly / As Needed | 50/50 White Distilled Vinegar / Water | 15 Min Soak + Soft Toothbrush | Dissolves hard water calcium and lime buildup |
| OEM Cassette Overhaul | Every 12–18 Months | Genuine Factory Foil/Cutter Block | Full Head Replacement | Restores factory cutting closeness to 0.05mm |
- Daily Rule: Rinse waterproof cutter blocks with warm running water and liquid soap for 15 seconds while the motor runs; shake off water and leave to air dry open.
- Weekly Rule: Disassemble the cutting block, sweep drive pins, submerge metallic foils in 70% isopropyl alcohol for 90 seconds, and apply 1 drop of clipper oil per foil track.
- The Deadly Habit: Never bang your shaver cassette against the sink basin; paper-thin foils dent instantly, creating jagged edges that scrape skin. For healing irritated follicles, follow our clinical guide on how to stop razor burn.
- Skin Connection: Routine sanitation prevents bacterial folliculitis along the neck. For specialized neck shaving protocols, see our guide on how to stop electric shaver irritation on the neck.
1. The Invisible Threat: Why Hygiene Controls Performance
Accumulated skin sebum, keratinized cellular debris, and bacterial colonies increase cutting friction by up to 40%, degrading motor velocity and inducing inflammatory Pseudofolliculitis barbae.
Let’s cut through the marketing fluff. Skipping regular electric shaver maintenance isn’t just a minor habit flaw—it’s actively wrecking your skin health and incinerating your hard-earned money.
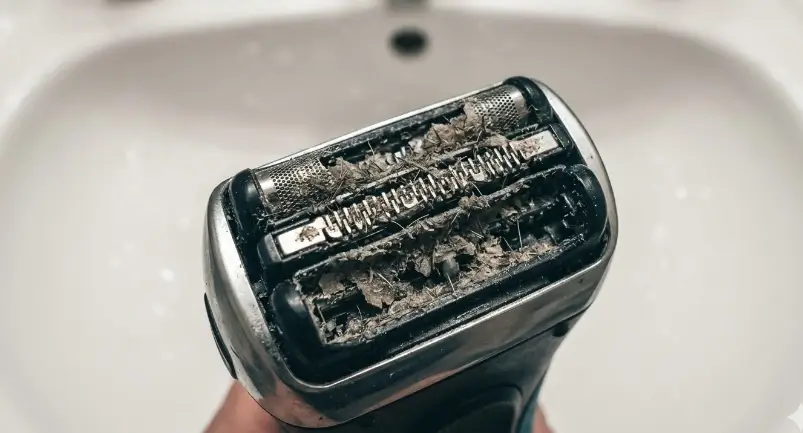
Electric shavers are precision-engineered devices capable of oscillating or rotating anywhere between 10,000 and 14,000 micro-cuts per minute. At those staggering speeds, every microscopic particle trapped inside the cutter housing acts as an abrasive compound against the ultra-thin steel blades and foils.
The Biological “Petri Dish” Effect
Every single time you glide those metal heads across your face or scalp, the blades strip away tiny fragments of keratinized skin tissue alongside facial oils (sebum). When you drop a warm, oil-saturated shaver onto a humid bathroom countertop, you create the absolute ideal incubational environment for Staphylococcus aureus and fungal spores.
Those mysterious, painful red bumps that continuously cluster around your lower neck and under the jawline aren’t “just razor burn.” In over 80% of clinical grooming cases, that is bacterial Pseudofolliculitis barbae or infectious folliculitis caused directly by an unsanitized shaver head. A routine blast of Sanitizing Shaver Spray is literally the only protective barrier between your dermal layer and a severe breakout. For men dealing with persistent bumps, check our guide to the best electric shavers for razor bumps.
Mechanical Friction & Motor Stasis
Think of your electric razor like a high-performance sports car engine. If you never change the oil and allow carbon dust to accumulate inside the pistons, the engine will overheat, lose torque, and eventually seize completely.
When dead hair dust bogs down the cutting block, internal friction skyrockets. This causes two massive problems: first, the battery drains twice as fast because the motor is struggling against physical resistance; second, the outer metallic foils heat up to uncomfortable temperatures, inflicting thermal contact burns directly onto your face.
The Financial Damage of Neglect
High-end replacement foil cassettes for flagship shavers like the Braun Series 9 or Panasonic Arc6 can easily cost $60 to $90. Moisture mixed with human facial acids causes micro-corrosion on high-carbon Japanese stainless steel edges. If you neglect maintenance, you’ll be forced to buy Replacement Blades on Amazon every 5 to 6 months instead of enjoying their full 18-to-24-month operational lifespan.
Note for Bald & Head-Shavers: Scalp skin contains significantly more sebaceous glands per square inch than facial skin. If you shave your head daily, hygiene protocols are doubled in priority. For models specifically designed to handle heavy hair density and easy washing, read our comprehensive review on the Best Electric Shavers for Bald Heads.
2. Foil vs. Rotary Shavers: Anatomical Cleanliness
Foil shavers capture compacted stubble directly beneath linear oscillating blocks, while rotary shavers accumulate hair slurry within a central multi-disc reservoir chamber. Understanding these mechanical pathways dictates how you clean each system safely. For core engineering trade-offs between both formats, explore our comprehensive breakdown of foil vs. rotary shavers.
Before applying cleaning solutions, you must understand the exact mechanical architecture of your specific device. Foil shavers and rotary shavers trap debris in fundamentally different ways.
Foil Shaver Mechanics (Braun, Panasonic, Wahl)
Foil shavers utilize ultra-thin perforated metal sheets (foils) that trap hair strands while inner blades oscillate sideways at hyper speeds.
- Debris Trapping: Hair dust gets packed tightly directly underneath the blade block and inside the foil mesh crevices.
- Vulnerability: Foils are paper-thin. Physical pressure from a brush will deform the mesh and cause severe skin scratches.
Rotary Shaver Mechanics (Philips Norelco, Remington)
Rotary shavers feature three or more circular, spinning heads with floating tracks that flex against facial contours.
- Debris Trapping: Hair collects inside the central hair chamber underneath the hinged head bracket.
- Vulnerability: Rotary cutters are individually paired with matched outer guards. Mixing up cutter #1 with guard #2 will drastically reduce cutting sharpness.
3. The Daily 30-Second Reset (Step-by-Step)
Thermal water flushing with active motor oscillation dislodges 90% of trapped stubble and dissolved sebum within 30 seconds post-shave.
You don’t need a tedious, 20-minute ritual after every morning shave. You simply need a disciplined, non-negotiable 30-second post-shave reset. Treat it like brushing your teeth.
Protocol A: The “Running Rinse” (100% Waterproof Shavers)
Applicable for modern wet/dry flagships like the Panasonic Arc5 or Braun Series 9 Pro.
- Crank Hot Water: Warm-to-hot tap water is mandatory to soften hardened skin fats and sebum. Cold water simply solidifies oils.
- Soap Emulsification: Apply 1-2 small drops of liquid mild hand soap directly onto the outer foils or rotary tracks.
- Motor Engagement: Turn the shaver ON while holding the head under the running faucet stream for 15 seconds. High-speed ultrasonic vibrations break apart stubborn clumps.
- Final Rinse: Pop off the foil cassette and rinse the inner cutting block directly under hot water.
Protocol B: The “Dry Brush Method” (Non-Waterproof Shavers)
Mandatory for older corded models, vintage barbershop trimmers, or dry-only travel units.
- Disconnect Power: Unplug the cord or turn off battery power completely before opening.
- Remove Frame: Gently press side release buttons to detach the foil block frame.
- Inner Cleaning: Take a stiff-bristled Double-Sided Cleaning Brush and sweep out hair dust from the internal drive pin assembly.
- The Golden Rule: NEVER brush the foil screen itself. The bristles will catch on microscopic holes, bending the foil outward into knife-like burrs.
⚠️ Stop the “Porcelain Percussion” Habit Immediately
Banging your shaver head against the hard edge of a ceramic sink or marble countertop is pure equipment sabotage. Metallic foils are manufactured at tolerances thinner than a human hair (often around 0.05mm). A single microscopic impact against porcelain causes hairline dents. When you turn the motor back on, those dented foils press directly against blades spinning at 14,000 RPM, turning your premium razor into a literal cheese grater. Tap your shaver head ONLY against a Soft Microfiber Towel or palm.
Air Drying: The “Shake & Breathe” Technique
After rinsing under hot water, give the shaver handle 3 to 4 vigorous shakes over your sink to force out trapped water droplets. Do NOT snap the plastic protective travel cap back on while wet.
If you lock a moist shaver inside a closed plastic cap or place it inside a dark bathroom medicine cabinet, you create an airtight greenhouse that guarantees black mold growth and severe steel oxidation within weeks. Leave the shaver disassembled on a dry towel in an open-air environment.
4. The Weekend Deep-Clean: The Biological Reset
Immersion in 70% isopropyl alcohol for 90 seconds eliminates bacterial biofilms and fungal cultures that withstand standard water flushes.
Once a week—preferably on Sunday mornings—it’s time to stop taking shortcuts. The daily rinse is just surface maintenance; a deep clean is a full biological reset for your grooming tools.
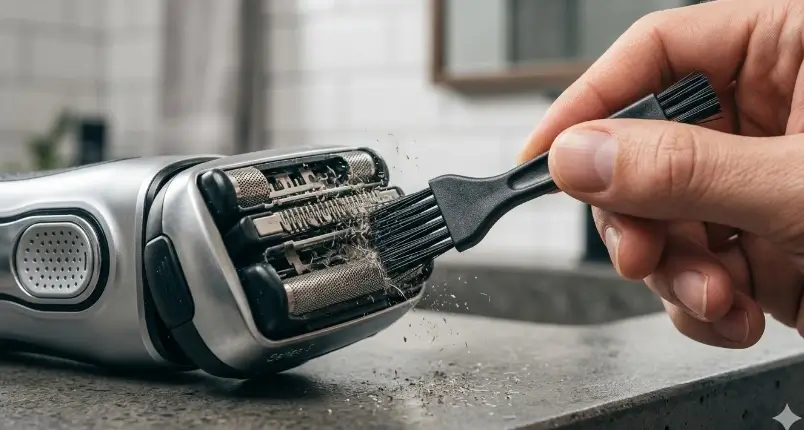
Step 1: Total Modular Disassembly
Pop off the outer cassette block completely. If you own a rotary shaver, unclip the central retaining bracket frame to free all three individual rotary cutter blades and their corresponding guard tracks.
Step 2: Precision Dry Sweeping
Using a specialized Shaver Cleaning Brush, dislodge compacted hair dust from underneath the drive shafts, spring-loaded pins, and internal rubber seals.
Step 3: The Alcohol Disinfection Dip (The Sanitizing Secret)
Water alone cannot dissolve stubborn fungal spore coats or bacterial biofilms. Pour a small amount of 70% Isopropyl Alcohol into a small glass bowl or container (Do not use 91% or 99% alcohol as it evaporates too rapidly to effectively kill bacterial cell walls).
Submerge ONLY the metallic cutting elements and foil cassette into the alcohol bath for 60 to 90 seconds. Alternatively, liberally spray all cutting heads with an aerosol Professional Shaver Cleaning Spray, which sterilizes and evaporates cleanly without causing rust.
Step 4: Dish Soap Thermal Degreasing Soak
If your shaver has accumulated a sticky brown residue (a mix of skin sebum and old lubricant), place the metallic parts in a bowl of hot water mixed with a drop of grease-cutting liquid dish soap. Let it soak for 10 minutes, then scrub gently with an extra-soft toothbrush.
Step 5: Extended Open-Air Evaporation
Lay all disassembled components onto a clean microfiber cloth. Allow a minimum of 2 to 3 hours of air drying before reassembly. Moisture must be completely eliminated prior to applying lubrication oil.
5. The Science of Friction & Mechanical Lubrication
Unfragranced mineral clipper oil establishes a micro-thin boundary layer between high-speed steel cutters and perforated outer foils, reducing operating temperatures by up to 15°F.
If you regularly wash your electric shaver with soap or alcohol and skip lubrication, you are actively ruining your shaver blades.
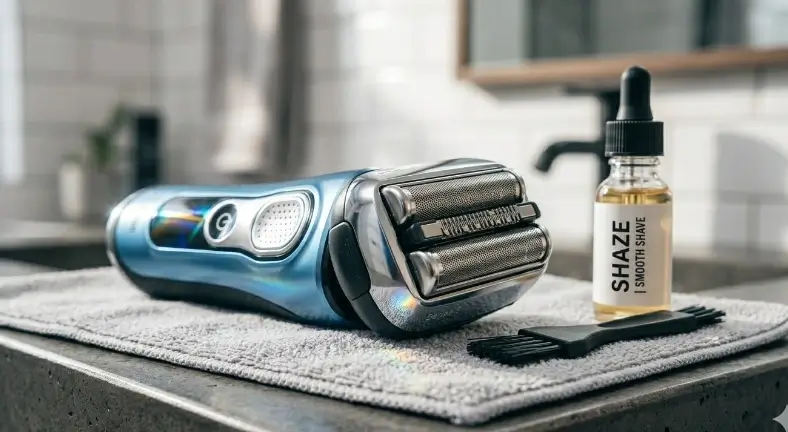
Liquid soaps and isopropyl alcohol act as powerful degreasers. While they strip away dirt, they also strip away every trace of factory-applied lubricant. Stainless steel blades rubbing against stainless steel foils at ultra-high speeds without lubrication causes immediate friction heating, rapid metal dulling, and severe battery drain.
The Master “2-Drop Rule” Protocol
- Ensure Complete Dryness: Never apply oil to wet metallic parts. Water repels oil and prevents uniform surface adhesion.
- Micro-Drop Application: Apply exactly 1 drop of oil onto each outer foil mesh or 1 drop onto each circular rotary guard track.
- Distribution Run: Switch the shaver ON for 20 seconds. This allows high-speed movement to spread the thin oil film evenly across all contact points.
- Towel Wipe: Take a soft dry tissue and lightly dab off any microscopic excess oil from the top surface to prevent grease transfer onto your skin during your next shave.
Selecting the Correct Lubricant Formulation
Never use household 3-in-One oil, WD-40, motor oil, or natural cooking oils (like olive or coconut oil). Cooking oils will gum up, oxidize, turn rancid, and lock your motor completely within weeks!
The industry standard formulation is pure, highly refined, ultra-low-viscosity mineral oil, such as Wahl Clipper & Shaver Oil. It is completely clear, 100% odorless, non-reactive with skin, and specifically engineered to withstand high RPM friction without breaking down.
6. Automated Cleaning Stations vs. Manual Discipline
Automated cleaning stations deliver 99.9% alcohol-based sterilization at an annual consumable cost of $35 to $50, whereas disciplined manual maintenance achieves comparable hygiene for under $3 per year.
Flagship shavers often include bulky, automated cleaning stations (e.g., Braun Clean & Charge System or Panasonic Auto Clean Center). Are these luxury docks worth your money?
(Scroll horizontally on mobile devices to view full table)
| Evaluation Factor | Automated Cleaning Station | Manual Washing & Oiling Routine |
|---|---|---|
| User Effort | 10/10 Effortless: Dock the shaver and press one button. | 6/10 Moderate: Requires manual disassembling, brushing, and oiling. |
| Sanitization Level | 9.9/10 Alcohol cartridges destroy 99.9% of bacterial spores. | 8/10 Highly dependent on user discipline and alcohol sprays. |
| Blade Lubrication | Automated: Fluid contains built-in friction lubricants. | Manual: Requires manual mineral oil drops every week. |
| Long-Term Cost | High: Requires replacing fluid cartridges every 1 to 2 months ($35–$50/yr). | Ultra-Low: One bottle of Wahl oil ($8) lasts 3 to 5 years. |
| Countertop Footprint | Large: Takes up significant bathroom sink space and requires power outlets. | Zero: Compact shaver sits in a small pouch or charging stand. |
7. Troubleshooting: Smells, Noise, Heat & Drag
Excessive cutting block temperatures above 105°F and high-pitched motor rattling stem directly from dry friction starvation or drive pin hair compaction.
Is your electric shaver exhibiting unusual symptoms? Use this professional diagnostic checklist to resolve performance issues instantly:
Symptom A: Musty or Mildew Odors From the Shaver Head
Root Cause: Mold or bacterial colonies growing in moist hair slurry trapped under plastic components.
The Fix: Submerge metallic cassette parts in warm water mixed with 1 tablespoon of white vinegar or baking soda for 15 minutes. Rinse thoroughly, spray with Isopropyl Alcohol, and let air-dry in direct sunlight for 4 hours.
Symptom B: Foils Feel Burning Hot Against Skin Within 2 Minutes
Root Cause: Total lack of lubrication creating extreme dry friction heat between blades and foils.
The Fix: Clean with liquid dish soap to strip away dry gunk, dry completely, and immediately apply 2 drops of clipper oil onto outer foils.
Symptom C: Motor Pitch Sounds High-Pitched or Loud & Rattling
Root Cause: Hair debris trapped around drive pin couplings, or a cracked plastic cutter housing.
The Fix: Remove cutter block, inspect drive pins for hair wraps, use a toothpick to clear drive shaft crevices, and apply 1 drop of oil to drive pin joint.
8. Skin Science: How Dirty Shavers Cause Folliculitis
Microscopic stratum corneum abrasions inoculated with colonized Staphylococcus aureus trigger painful pustular folliculitis across sensitive neck and facial zones.
Maintaining a clean electric shaver isn’t just about preserving hardware—it is a critical aspect of dermatological care.
During electric shaving, outer foils compress skin tissue to push facial hairs upward through tiny perforations. While doing so, outer blade edges create microscopic abrasion cuts (micro-tears) across the stratum corneum (the outermost skin layer).
The Infection Pathway
- Contamination: An unwashed shaver harbors bacterial cultures like Staphylococcus aureus.
- Inoculation: As the foil glides across your jaw, micro-tears are filled with dirty shaver residue.
- Inflammation: Bacteria penetrate deep inside follicle walls, triggering an immune response that creates red, pus-filled papules.
- Prevention Protocol: Always splash cold water or alcohol-free witch hazel onto your face post-shave to constrict pores, and keep shaver heads sanitized!
9. Blade Replacement Lifecycle & OEM Standards
Stainless steel cutting edges experience molecular micro-pitting after 12 to 18 months, necessitating OEM cassette replacement to eliminate mechanical hair pulling.
Even if you clean and lubricate your shaver like a military mechanic, steel inevitably succumbs to molecular fatigue over time.
The 3 Clear Signs of Mechanical Blade Death
- The Hair Pulling Factor: Instead of cleanly slicing hairs, the dulling blades yank hair follicles sideways, causing sharp pinprick sensations.
- The Multi-Pass Requirement: A session that used to take 3 minutes now requires 8 minutes and 5 repetitive passes over the exact same neck area.
- Persistent Friction Burn: You clean and oil the head thoroughly, yet experience burning sensations due to microscopic pitting along blade edges.
Always Buy Genuine OEM Parts (Avoid Cheap Counterfeits)
Third-party, unbranded replacement heads on discount sites are made from inferior steel alloys that dull in weeks and often feature uneven mesh holes that scratch skin. Stick exclusively to factory-certified replacement parts:
- Braun Series 9 / 9 Pro: Braun 94M Replacement Cassette (Replace every 18 months). For shaver benchmark metrics, read our comprehensive Braun Series 9 Pro review.
- Philips Norelco Rotary: SH71 Replacement Heads or SH91 Cutter Units (Replace every 12 months)
- Panasonic Arc5: Genuine WES9032 Outer Foil & Inner Blade Combo (Replace every 12–18 months)
10. Frequently Asked Questions (FAQ)
Standard operating procedures and chemical safety parameters clarify common electric shaver sanitation protocols.
Q1: Can I submerge my entire electric shaver handle in water?
Only if your unit is explicitly rated IPX7 Waterproof or displays a “Wet/Dry” symbol on the body. If your shaver has a cord socket directly exposed on the bottom without a rubber seal or says “Dry Only”, NEVER submerge the handle body in water.
Q2: Is Barbicide safe for electric shaver heads?
Yes, Barbicide is safe for metallic blades, but do NOT soak plastic foil housing frames in Barbicide for extended periods (over 10 minutes), as the chemical concentrate can degrade plastic coatings over time.
Q3: Can I use Baby Oil to lubricate my electric razor?
Baby oil is mineral oil with added fragrance. While acceptable in an emergency, heavily fragranced baby oils can leave an unpleasant residue and potentially irritate skin during shaving. Stick to pure, unfragranced clipper oil.
Q4: How do I remove hard water mineral scale from my shaver head?
If white calcium deposits build up around foils due to hard tap water, soak the metallic cutter head in a 50/50 mixture of warm water and white distilled vinegar for 15 minutes, then scrub gently with a soft toothbrush.