Stop shaving with a dirty razor! Learn how to clean your electric shaver like a pro to prevent razor burn, kill bacteria, and double your blade life. Read more!
Let’s be real: Your electric shaver is probably disgusting.
You use it every morning to look sharp for that Zoom call or date night, but when was the last time you actually cleaned it? If you’re just tapping it against the sink and calling it a day, you’re not just shaving—you’re rubbing a petri dish of dead skin cells, dried sebum, and bacteria all over your face.
As a grooming expert, I see the results of poor maintenance every day: razor burn, breakouts, and men wondering why their $200 Braun feels like a butter knife.
Here is how to clean your electric shaver like a professional, save your skin, and make your blades last twice as long.
1. Why You Must Clean Your Electric Shaver Regularly
Let’s not sugarcoat it: if you aren’t cleaning your shaver, you’re essentially rubbing a biohazard on your face every morning.
Most guys think a quick “tap-and-shake” over the sink is enough. It’s not. Here is why skipping a deep clean is sabotaging your skin, your wallet, and your look:
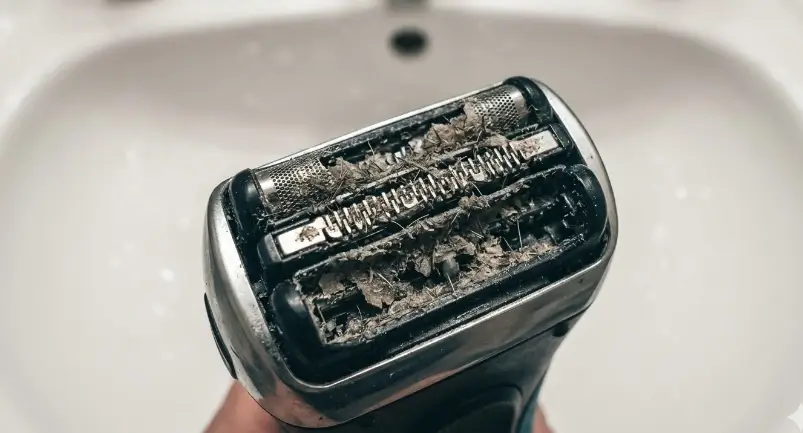
The “Petri Dish” Effect
Every time those blades glide over your skin, they harvest a cocktail of dead skin cells, facial oils (sebum), and tiny hair clippings. When left in the warm, damp environment of your bathroom, this mixture becomes a breeding ground for bacteria.
-
The Result: Those “random” red bumps on your neck? That’s likely folliculitis or acne caused by a dirty razor. A professional-grade [Sanitizing Shaver Spray] is the only thing standing between you and a breakout.
Friction is the Performance Killer
Think of your shaver like a high-performance engine. When hair and oil gunk up the internal cutters, the motor has to work twice as hard to maintain speed.
-
The Result: The blades run hotter, which leads to razor burn. If your face feels like it’s being dragged across hot asphalt, your shaver isn’t “bad”—it’s just clogged.
The Financial Hit (Blade Longevity)
Quality replacement heads for a Braun or Norelco aren’t cheap—we’re talking $40 to $60 a pop. When residue builds up, it creates micro-corrosion on the blade edges.
-
The Result: You’ll find yourself hunting for [Replacement Blades on Amazon] every six months instead of the standard 18. Cleaning your gear isn’t just about hygiene; it’s about not setting your lunch money on fire.
This is especially critical for head shavers who cover a larger skin surface. If you are a head shaver, maintaining hygiene is non-negotiable—check out the Best Electric Shavers for Bald Heads 2026 that are engineered for easy cleaning
2. Daily Maintenance: How to Clean Your Electric Shaver After Every Use
You don’t need a 20-minute spa day for your shaver every morning—nobody has time for that before coffee. But you do need what I call the “30-Second Reset.” Think of it like brushing your teeth; if you skip it, things get nasty fast.
Here is the professional way to handle the daily grind without ruining your equipment.
The “Running Rinse” (For Wet/Dry Models)
If you own a modern powerhouse like the [Panasonic Arc5] or a [Braun Series 8/9], your tool is waterproof. Use it.
-
Hot Water is King: Turn on the tap to a comfortably hot temperature. Cold water won’t dissolve skin oils.
-
Keep it Humming: Apply a tiny drop of liquid soap to the foils and turn the shaver on. The vibration helps the soap penetrate the cutters and shake loose the “stubble cement.”
-
Rinse & Repeat: Let the water flow through the head for 15 seconds.
The Golden Rule: Stop the “Porcelain Percussion”
I see this constantly in locker rooms and hotels: a guy finishes his shave and bangs the head of the shaver against the side of the sink to get the hair out.
-
Stop it. Just stop.
-
The foils on your shaver are engineered to be thinner than a sheet of paper. One microscopic dent from hitting that porcelain sink and you’ve just turned your shaver into a cheese grater for your face.
-
If you need to dislodge hair, a gentle tap on a [Soft Microfiber Towel] is the only way to go.
The “Dry Brush” (For Non-Waterproof Models)
If you’re rocking an older model or a travel razor that isn’t wash-friendly:
-
Pop the Top: Open the head unit or remove the foil frame.
-
Brush the Interior: Use a [Double-Sided Cleaning Brush] to sweep the hair out of the inner chamber and the blades.
-
Hands Off the Foil: Never, and I mean never, rub the brush against the foil itself. You’ll snag the metal and ruin the cutting geometry.
The “Shake & Bake” (Air Drying)
Once you’re done rinsing, give the shaver a few firm shakes (in the air, not against the sink!) to remove excess water. Leave the head unit off or the cap open.
-
Pro Tip: If you leave a wet shaver closed in a dark cabinet, you’re essentially building a luxury hotel for mold. Let it air dry on your counter for at least an hour.
Expert Verdict: If you do this every single morning, your weekly deep clean becomes a breeze. If you skip this, you’re basically trying to shave with a clogged lawnmower.
3. The Professional Deep Cleaning Guide: Step-by-Step
Once a week, you need to stop playing around. Your daily rinse is great, but it’s just a surface fix. Think of this weekly routine as the “Saturday Morning Oil Change” for your face.
If you want your shaver to cut as it did on Day 1, follow this professional protocol. No shortcuts.
Step 1: The Full Disassembly
Don’t just pop the cap; get in there.
-
For Foil Shavers (Braun, Panasonic): Remove the entire foil cassette.
-
For Rotary Shavers (Philips Norelco): Most modern rotaries have a “one-touch” open button. If yours is older, you might need to unlock the retaining frame to access the individual three cutters.
Step 2: The Precision Dry Brush
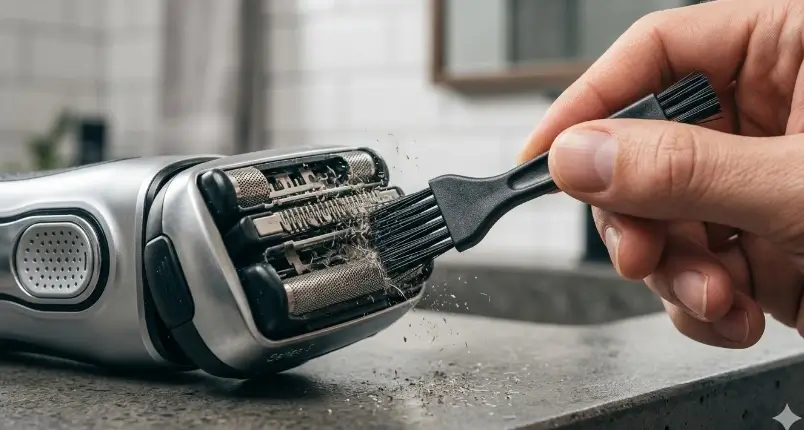
Grab that [Double-Sided Shaver Cleaning Brush] we talked about.
-
The Body: Brush out the “hair chamber”—the area under the blades where the motor drives the cutters. You’ll be shocked at the pile of hair dust that’s been hiding there.
-
The Blades: Gently sweep the inner blades.
-
The Warning: I’ll say it again for the guys in the back: Do not brush the foils. You will ruin the microscopic holes that capture your hair, and your next shave will feel like a cat scratching your face.
Step 3: Sanitizing (The Secret Sauce)
Water and soap can only do so much. To truly kill the bacteria that cause “shaver funk” and breakouts, you need Isopropyl Alcohol.
-
The Pro Method: Pour some 70% Isopropyl Alcohol into a small container. Dip the cutting elements (not the whole shaver!) into the liquid for about 30 seconds.
-
The Shortcut: If you’re in a rush, use a [Professional Shaver Cleaning Spray]. It’s basically alcohol on steroids that evaporates instantly and leaves a fresh scent.
Step 4: The Deep Soap Soak
Even after alcohol, some skin oils are stubborn.
-
Reattach the head (or keep it off if you’re soaking just the cassette).
-
Use a dedicated cleaning solution or a drop of mild dish soap.
-
Let it sit in a shallow bowl of warm water for 5 minutes. This breaks down the “bio-film” that alcohol might have missed.
Step 5: The “Breathe” Technique (Air-Drying)
This is where most men fail. They clean the shaver and immediately put the plastic travel cap back on.
-
Stop. That cap is a moisture trap.
-
Lay your shaver and its components out on a clean, dry towel. Let it sit for at least 2–4 hours (or overnight). A bone-dry shaver is a bacteria-free shaver.
The “Clean Shaver” Checklist:
-
[ ] No visible hair in the chamber.
-
[ ] No “stale” smell coming from the blades.
-
[ ] No white mineral buildup on the foils.
Expert Verdict: If you follow these 5 steps every Sunday, your shaver will outperform your buddy’s brand-new model within three months. It’s not about the price of the tool; it’s about the discipline of the man.
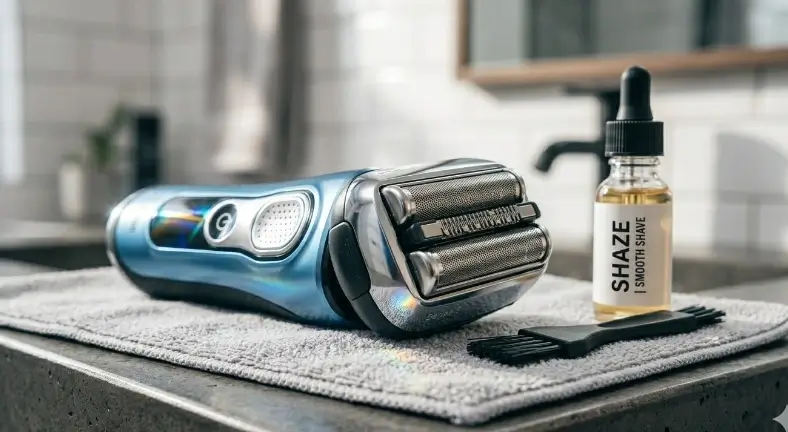
4. Lubrication: The Secret to Professional Electric Shaver Care
If you’re skipping this step, you might as well be shaving with a rusty pocketknife.
Think of your electric shaver like a high-performance car engine. You wouldn’t drive a Porsche for 50,000 miles without an oil change, would you? Metal rubbing against metal at 10,000 RPMs creates friction, and friction creates heat.
When those blades get hot, they expand, lose their edge, and start “dragging” across your skin instead of cutting. That’s where the dreaded razor burn comes from.
The “2-Drop Rule”
You don’t need to drench the thing. Here is the pro-level routine:
-
Dry First: Ensure your shaver is bone-dry after its cleaning. Oil and water don’t mix.
-
The Placement: Put one tiny drop of oil on each foil or each rotary head.
-
Distribute: Turn the shaver on for 15–20 seconds. This allows the oil to work its way into the microscopic gaps between the moving blades and the stationary guards.
-
The Wipe: Use a tissue to gently dab away any excess oil from the surface. You want the lubrication inside the cutters, not smeared all over your face.
What Oil Should You Use?
Do not—I repeat, DO NOT—grab a bottle of WD-40 from the garage or olive oil from the kitchen. You’ll end up with a ruined motor, a stinky bathroom, and a massive skin rash.
-
The Gold Standard: [Wahl Clipper Oil] is the industry favorite. It’s thin, odorless, and won’t gum up the works.
-
The Specialized Choice: If you want something designed specifically for high-speed shavers, go with [Freehold Shaver Lubricant]. It’s engineered to withstand the heat of daily use.
Why This Saves You Money
Lubrication is the ultimate “life-extender.” By reducing friction, you’re preventing the blades from dulling prematurely. A well-lubricated blade stays sharp for up to 6 months longer than a dry one.
-
Expert Tip: If you use a cleaning station (like Braun’s), the fluid usually contains a lubricant. But if you’re cleaning manually, you must do this yourself at least twice a week.
The Verdict: If your shaver sounds like a dying lawnmower, it’s thirsty. Feed it some oil, and your face will thank you.
5. Cleaning Station vs. Manual Cleaning: Which is Better?
Every time you buy a high-end shaver, the manufacturer tries to upsell you on that bulky, plastic base that looks like it belongs on the bridge of a starship. It’s the “Lazy Man’s Dream” vs. “The Purist’s Routine.”
The Case for the Cleaning Station (The “Tesla” Method)
If you value your time more than a few bucks a month, the station is a no-brainer.
-
Sanitize: The alcohol nukes 99.9% of the bacteria we talked about in Step 1.
-
Lubricate: The fluid contains a secret blend of lubricants that keep the blades sliding perfectly.
-
Dry: High-end stations use an active fan to bone-dry the blades, preventing that “wet dog” smell.
-
The “Lazy Tax”: You have to buy [Replacement Cleaning Cartridges] every 2–3 months. It’s a subscription for your bathroom.
The Case for Manual Cleaning (The “Old School” Way)
Cleaning by hand is for the man who wants total control and zero “subscription” fees.
-
The Win: You save about $60–$100 a year on cartridges. Plus, let’s be honest: a station can miss some of that “stubble cement” tucked deep in the corners of a rotary head.
-
The Loss: Human error. Most guys get lazy by week three, skip the oil, and end up with a dull shaver and a red neck.
The “Grooming Guru” Verdict
| Feature | Cleaning Station | Manual Cleaning |
| Effort | 1/10 (Push a button) | 8/10 (Brush, soak, dry, oil) |
| Hygiene | Exceptional (Alcohol-based) | Good (If you use 70% Alcohol) |
| Cost | Ongoing ($$ Cartridges) | One-time ($ for oil/brush) |
| Blade Life | Maximize (Always lubed) | High (Only if you don’t forget) |
6. When to Replace Your Blades? (The Hard Truth)
You can clean your shaver until it shines like a diamond, but at the end of the day, metal has a lifespan. Even the highest-grade Swedish steel used by Panasonic or the specialized foils from Braun aren’t immortal.
Eventually, those microscopic cutting edges lose their “bite.” Here is the reality check: If you’re pushing past the 18-month mark, you’re not shaving—you’re just annoying your face.
The “3 Signs of Death” for Your Shaver Blades
Don’t wait for the blades to literally break. Look for these red flags:
-
The “Yank” Factor: If the shaver starts pulling or “yanking” at your stubble instead of gliding through it, the blades are dull. Period.
-
The Infinite Pass: If a shave that used to take 3 minutes now takes 8 minutes and 40 passes over the same spot, the cutting geometry is gone.
-
The Return of the Red: If you’re following my cleaning and lubrication steps but still getting razor burn, it’s because the blades have developed microscopic “pits” and jagged edges that are scraping your skin.
The Timeline: How Long Do They Really Last?
Most manufacturers give you a “safe” window, but as an expert, I’ll give you the real numbers:
-
The “Lumberjack” (Thick, Wiry Hair): Replace every 10–12 months. Your hair is like copper wire; it eats steel for breakfast.
-
The Average Joe: Replace every 15–18 months. This is the sweet spot for most guys.
-
The “Barely-There” Stubble: You might get away with 24 months, but the foils will likely wear thin and become sharp before then.
Don’t Get “Analysis Paralysis” – Buy the Right Part
Finding the right head can be a nightmare with all the model numbers. Here are the “Greatest Hits” that most of you are looking for:
-
For Braun Series 9/9 Pro: You need the [Braun 94M Replacement Head]. It’s the gold standard.
-
For Philips Norelco (Rotary): Look for the [SH71] or [SH91] replacement blades.
-
For Panasonic Arc5: Don’t just replace the foil; get the [Outer Foil & Inner Blade Combo]. Replacing just one is like putting one new tire on a car.
Summary & FAQs: Everything Else You Need to Know
To wrap this up: A clean shaver is the difference between a man who looks like a professional and a man who looks like he’s struggling with puberty. Keep it rinsed daily, deep-clean it weekly, and for the love of grooming, lubricate the blades.
If you take care of your tools, they’ll take care of your face. It’s that simple.
Final Word: Still haven’t picked your weapon of choice? Check out our brutal, honest breakdown of the [Best Electric Shavers of 2026] to see which models are the easiest to keep clean.
As an Amazon Associate, I earn from qualifying purchases. This comes at no extra cost to you. These commissions help support MenReviewHub in maintaining our grooming lab and providing high-quality, honest reviews for the community. Stay sharp!

Adam Lee is a personal care enthusiast and a veteran of the traditional wet shaving community, with over 10 years of experience testing artisanal and heritage soaps, aftershaves, and razors. At Men Review Hub, he personally puts every product through a minimum 30-day real-world trial to ensure you get an honest, practical look at what truly deserves a spot in your bathroom cabinet.